
NoMachine Customizations
Auto-Login
On Kali side, go to Startup & Shutdown > Login Screen (SDDM) and click Behavior . Set the Automatically log in as <username> setting.
Keyboard Shortcuts
When pressing keyboard combinations such as CTRL + C and CTRL + V the default NoMachine behavior is to ignore these on the guest and run them on the host. I prefer to have these shortcuts run on the guest when the NoMachine window is in the foreground.

Hover in the top-right and reveal the fold menu

Click Input

Select Grab the keyboard input
Best Viewing Experience
Set the Graphics Driver
Instructions are for Proxmox VE as the hypervisor
Set the graphics driver to VirtIO GPU and stop and start the VM to apply the new hardware.
Set the Display Server
The information here only applies to running Kali as a VM in the Proxmox hypervisor. If you choose to run Kali in a Linux Container (LXC), this section doesn't really apply, as LXC doesn't have a native graphics driver. It emulates a graphics drivers as nxoutput0 which doesn't have the problems described below.


Change to Plasma (X11)

I've also found that -- contrary to expectation -- choosing best quality seems to yield better performance on large screens
Setting Ad-Hoc Resolutions
NoMachine isn't perfect --- and neither is xrdp --- they both have their shortcomings, but I appreciate the flexibility and dynamic resizing options that NoMachine offers. Most RDP clients wouldn't allow for dynamic resizing the way NoMachine does.
Listing Default Resolutions
Running xrandr -q will show you the default resolutions X server makes available based on the driver in-use by the VM.
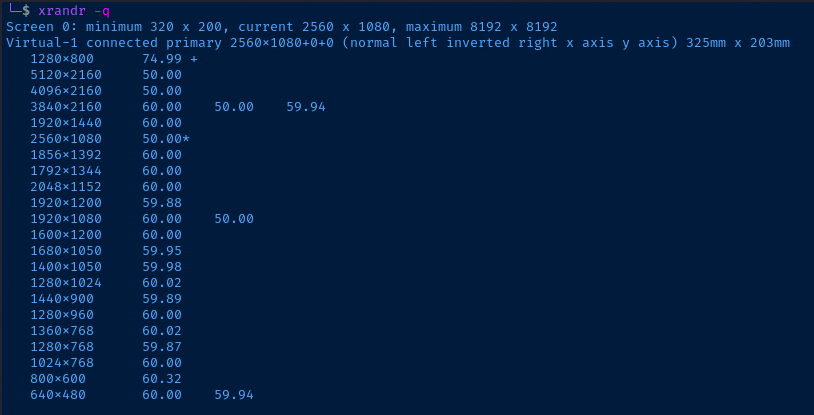
NoMachine client has the ability to auto-resize the remote display when resizing the client window. However, this will only work when the client has stretched the window to a size that conforms to one of the default available resolutions. You'll see in the output above that based on the video memory made available to this VM, I can set resolutions up to 8192x8192.

Adding Custom Resolutions
The monitor I am using at the time of this writing has a native resolution of 5120x1440 and various refresh rates, but currently outputting at 60hz due to unsupported hardware.
Scenario 1: Adding Native Resolution
Let's say I want to add full 5120x1440 @ 60Hz for when I want to run this VM in full screen mode. Open a terminal window and follow along.
# Calculate a new mode configuration
# 5120x1440 @ 60Hz
mode="5120 1440 60"
modeline=$(cvt `echo $mode` | grep Mode | sed -e 's/Modeline //g' -e 's/"//g')
modename=$(echo $modeline | cut -d ' ' -f 1 | sed 's/"//g')

# Get the display device name
display_device=$(xrandr | grep -e " connected [^(]" | sed -e "s/\([A-Z0-9]\+\) connected.*/\1/")

# Take the output from the cvt and add a new mode
xrandr --newmode `echo $modeline`

# Add the newly added mode to the list of resolutions
xrandr --addmode $display_device $modename


Note the availability of the new resolution at the bottom of the list.
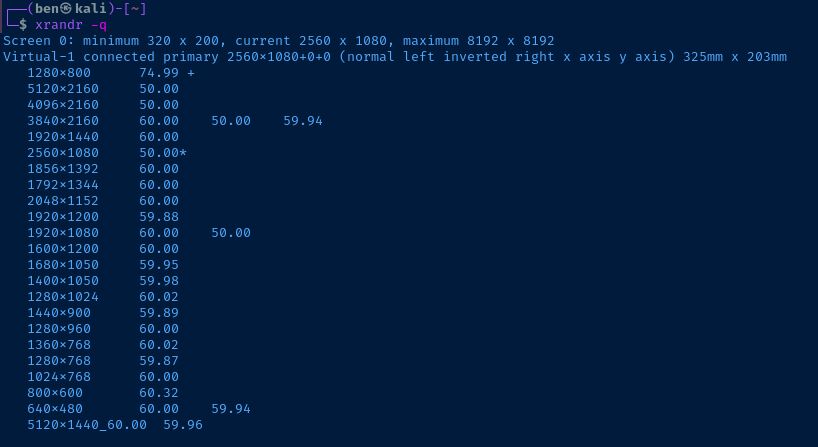
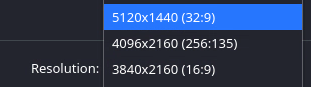
This resolution will also be available for selection in the graphical settings interface where you can manage your display resolution.
Once you've added the resolution to your VM, restart your NoMachine service with this command:
sudo systemctl restart nxserver.serviceOnce I restarted the NoMachine daemon, everything works perfectly and the client continues to dynamically resize to full screen mode when engaged or disengaged.
Persisting Reboots
These changes to the display configuration will not persist reboots, so you'll want to add the xrandr commands to your preferred Xsession script. I am using sddm as my login manager, so looking at /usr/share/sddm/scripts/Xsession, I can add the resolutions to a couple places to make it stick:
If you want your resolutions to be available to all users, put them in: /etc/X11/Xsession.d/100set-resolutions
If you want your resolutions to be user-specific, put them in: ~/.xsessionrc
sudo nano /etc/X11/Xsession.d/100set-resolutions# Add support for 5120x1440 @ 60Hz resolution at boot
mode="5120 1440 60"
modeline=$(cvt `echo $mode` | grep Mode | sed -e 's/Modeline //g' -e 's/"//g')
modename=$(echo $modeline | cut -d ' ' -f 1 | sed 's/"//g')
display_device=$(xrandr | grep -e " connected [^(]" | sed -e "s/\([A-Z0-9]\+\) connected.*/\1/")
xrandr --newmode `echo $modeline`
xrandr --addmode $display_device $modenameScenario 2: Adding Custom Window Sizes
So, maybe you want a window size that isn't full screen, but is bigger than the default resolutions provided by the driver. The easiest way to do this is the following steps:
- Figure out the dimensions of the window size
- Add support for the resolution following the steps covered above
Measure the Window Dimension
On your host machine (not the VM), open a PowerShell window (this guide is being written on a Windows host) and run the following command:
# 64 bit Chrome
& 'C:\Program Files\Google\Chrome\Application\chrome.exe' --app=https://whatismyviewport.com
This web app will dynamically tell you the viewport size as you resize the window. The viewport is the content of the application minus the title bar. This is important, because you don't want to include the title bar in your resolution. You only want your screen resolution to reflect the actual content viewport.
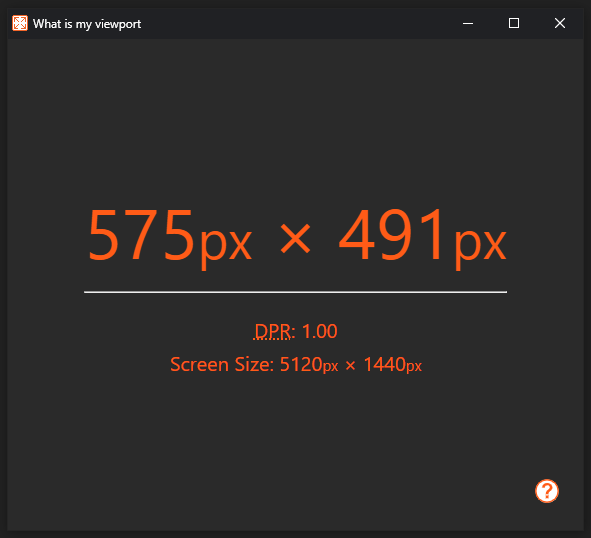
Add the Screen Resolution
If my viewport was set to 5120x1377 and running on a 60Hz output, then I'd add the resolution by running these commands:
# Add support for 5120x1377 @ 60Hz
mode="5120 1377 60"
modeline=$(cvt `echo $mode` | grep Mode | sed -e 's/Modeline //g' -e 's/"//g')
modename=$(echo $modeline | cut -d ' ' -f 1 | sed 's/"//g')
display_device=$(xrandr | grep -e " connected [^(]" | sed -e "s/\([A-Z0-9]\+\) connected.*/\1/")
xrandr --newmode `echo $modeline`
xrandr --addmode $display_device $modename
Don't forget to:
- Restart the NoMachine daemon
- Add the persistence to the
/etc/X11/Xsession.d/100set-resolutionsscript (your script path may differ).
References:
KDE Plasma-Specific Changes
Fix Audio Playback

Add an audio device to the VM
Install firmware-sof-signed to fix pipewire logging spam when using Intel device
sudo apt install -y pipewire-audio firmware-sof-signedInstalling pipewire-audio removes pulseaudio since they are conflicting packages
sudo sed -i.bak 's/AudioInterface pulseaudio/AudioInterface pipewire/g' /usr/NX/etc/node.cfgSet the audio interface to pipewire
sudo systemctl restart nxserver.serviceRestart the NX daemon

Set as the active audio device and test output to ensure functionality